Creating Discount Buttons
Discounts allow a POS operator to issue a discount value to an open account or table. Discounts can be configured for both percentage or currency value and can be either at a pre-set value or based on an open scenario where the operator enters the value to be discounted.
To create a discount:
-
Select Theme Modelling from the Aztec Start Page
-
Click Estate Setup, followed by the Discounts tab
-
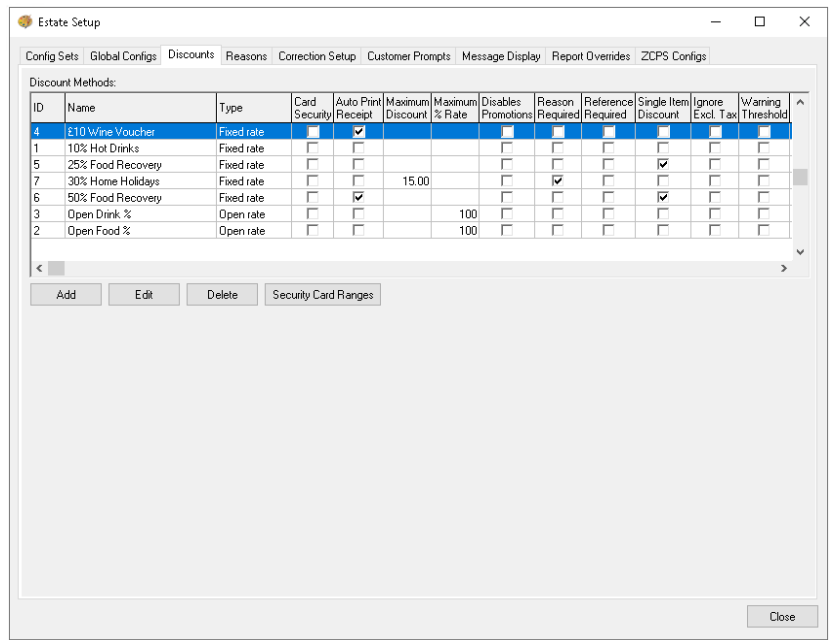
The discounts screen will be displayed showing a summary of any currently configured discounts:
-
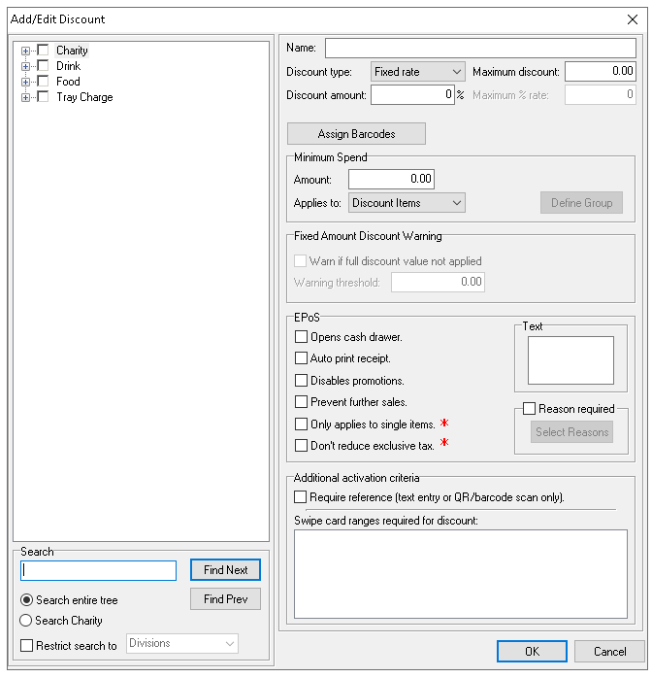
Click Add and the add / edit discount window will be displayed:
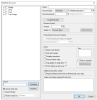
-
Enter the name for the discount, the name will be displayed on any guest printed materials (bills / receipts) and on any POS or Back of House Dimensions reports
-
Select from the drop-down the discount type
-
Fixed Rate - Percentage Discount
-
Fixed Amount - Currency Discount
-
Open Rate - Percentage Discount, open value entered at the POS
-
Open Amount - Currency Discount, open value entered at the POS
-
-
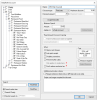
If applicable enter the discount amount in % or currency value
-
If applicable enter the maximum discount (the total currency value that would be discounted)
-
If applicable enter the maximum % rate (the maximum percentage value that can be entered when enter the discount on the POS)
-
If applicable enter the minimum spend (the value of the account / table before the discount becomes available)
Minimum Spends can be configured based on:
-
Discount Items - the products that are set to be discounted
-
Whole Account - all products contained within the account
-
Minimum Spend Group - specific set of products created
When selecting minimum spend group click the define group button and from the product hierarchy displayed tick the required products
-
-
Select the required products from the product hierarchy shown on the left, if the discount is for the entire division tick the box next to the division name or expand the tree clicking on the + icon and select the required products
-
If applicable complete any POS specific configurations:
-
Opens Cash Drawer - when the discount button is pressed the cash drawer will open
-
Auto Print Receipt - when the discount button is pressed a specific receipt is printed
-
Disable Promotions - when the discount button is pressed any active promotions on the account / table will be disabled
-
Prevent Further Sales - when the discount button is pressed no further products can be added to the account / table, if this is required the discount need to be corrected, products added and the discount re-issued
-
Only Applies to Single Items - if this check-box is selected the discount button is only available for use within the corrections screen. Single item discount allows specific selection of products to discount, for example a guest recovery where a complaint has been made a discount could be given to the specific product
-
Don't Reduce Exclusive Tax - if this check-box is selected exclusive taxes will not be reduced as part of the discount usages
-
Text - the discount name will automatically populate the button text, update if required
-
Select Reason - if this check-box is selected the select reasons button will become available to select any existing reasons for the discount. If no reasons have been configured these can be added in Estate Setup | Reasons tab
-
-
If applicable set any additional activation criteria:
-
Require Reference - if this check-box is selected the POS operator will be required to enter a forced reference which can be either typed or a QR scanned
-
If existing swipe cards have been configured these can be selected that can activate a discount by swiping the card on the magswipe reader on the POS terminal
-
-
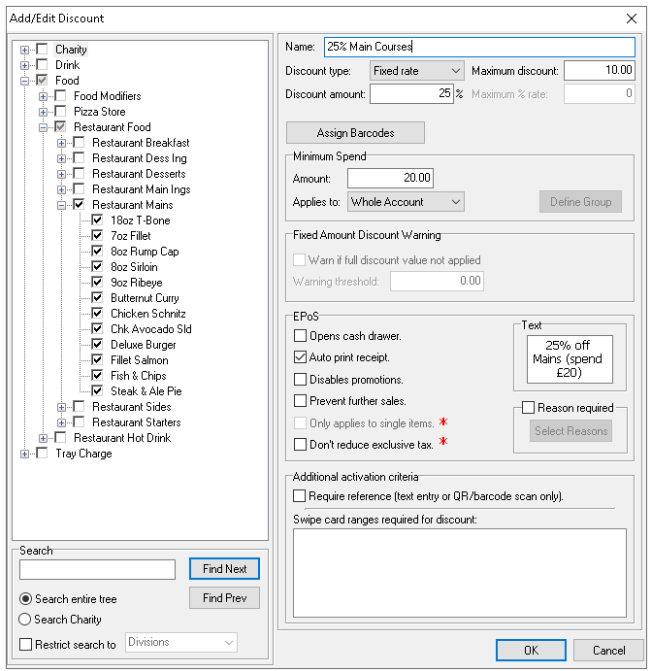
A completed discount might look similar to the below image:
-
When all of the configurations are completed click the OK button